EDNS:
Port 53 is reserved for DNS usage, DNS uses both UDP and TCP for message transport.
Conventional message exchanges are short, and thus well suited to the use of the very fast UDP;
DNS itself handles the detection and retransmission of lost requests.
For larger or more important exchanges of information, especially zone transfers, TCP is used -
both for its reliability and its ability to handle messages of any size. UDP DNS messages are
limited to 512 bytes; longer messages are truncated, and a special bit in the header is set to
indicate that this has occurred. If a message being truncated causes a problem for its recipient,
the query must be repeated using TCP.
One important item to note is that the 512-byte limit on DNS UDP messages can be surpassed if
the optional Extension Mechanisms for DNS are implemented by default Efficientip appliances have the following option with the size of 4096 "edns-udp-size 4096", most modern DNS name servers implement this extension. EDNS0 allows the formation of UDP packets up to 4096 bytes in length, however, most firewalls do not allow large UDP packets to pass through and will need to be reconfigured to allow these large UDP packets.
How to enable the EDNS on the authoritative to forward the query to the recursive with the original client "requester" IP:

The following configurations have been done on the Authoritative DNS to enable the EDNS from the CLI:
Open the CLI, start shell, and run sudo su, run the following command to edit the Global_include.conf file which is included in the named.conf service file:
ee /usr/local/nessy2/etc/named/global_include.conf

Note that edns-openddns-orgid and edns-openddns-deviceid are needed if you are forwarding to Cisco umbrella, in this setup we added random values.
The next step is to configure the forwarder from the properties of the authoritative smart or member:
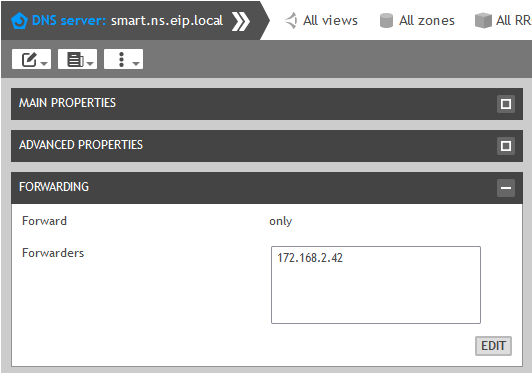
The following configurations to be done on the recursive server:
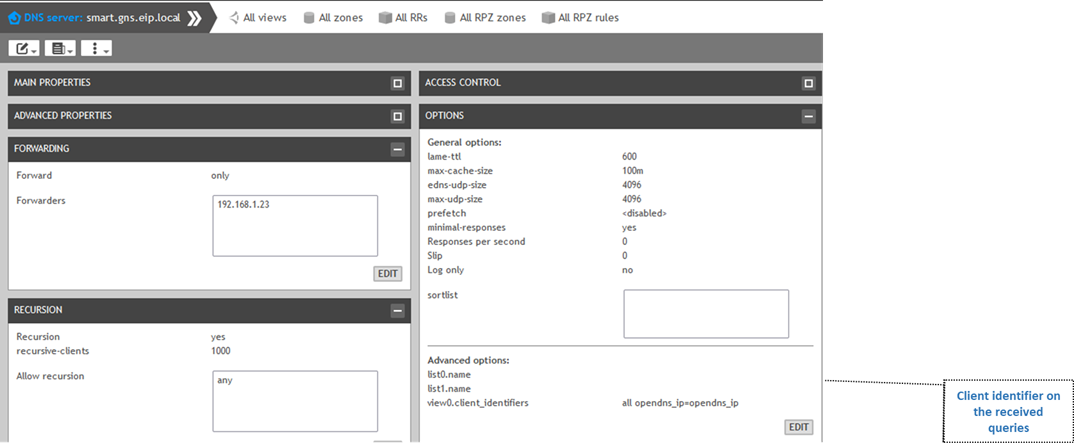
Edit the options to have : view0.client_identifiers all opendns_ip=opendns_ip
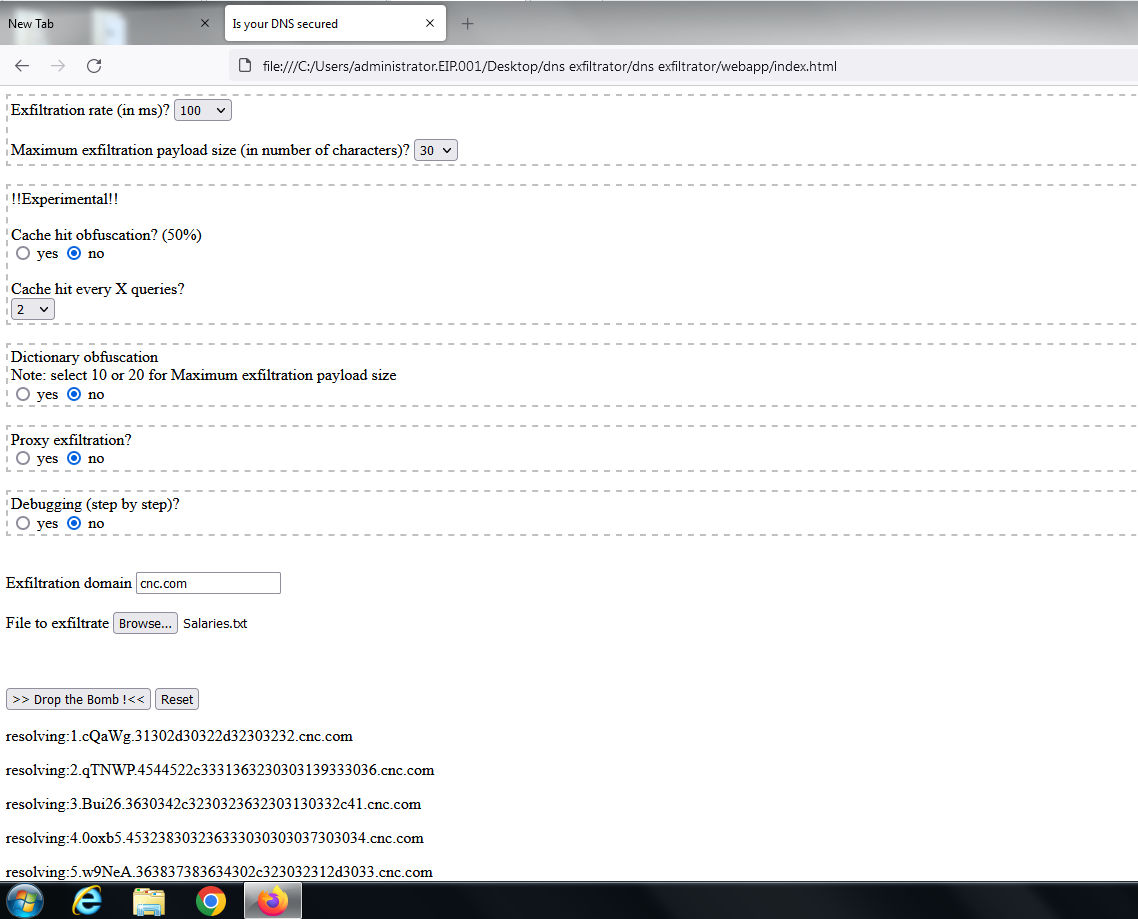
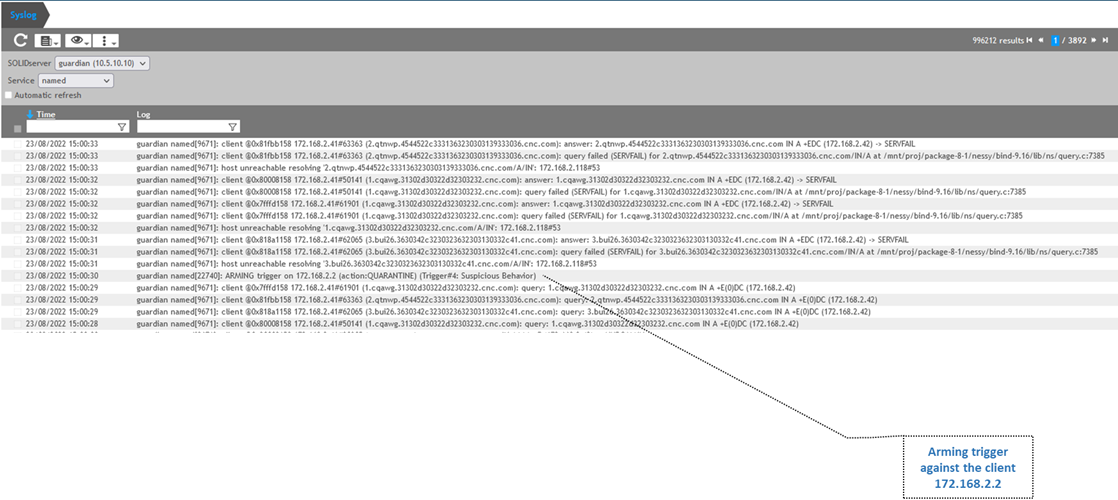
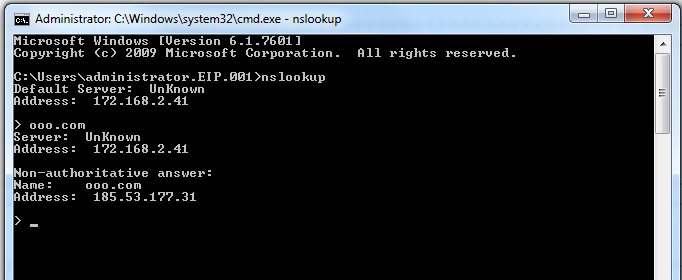
now to test the guardian is able to see the messages from the original requester we will send some queries from the client machine and view the syslogs:
The query was sent from the client "172.168.2.2" to the authoritative DNS "172.168.2.41"
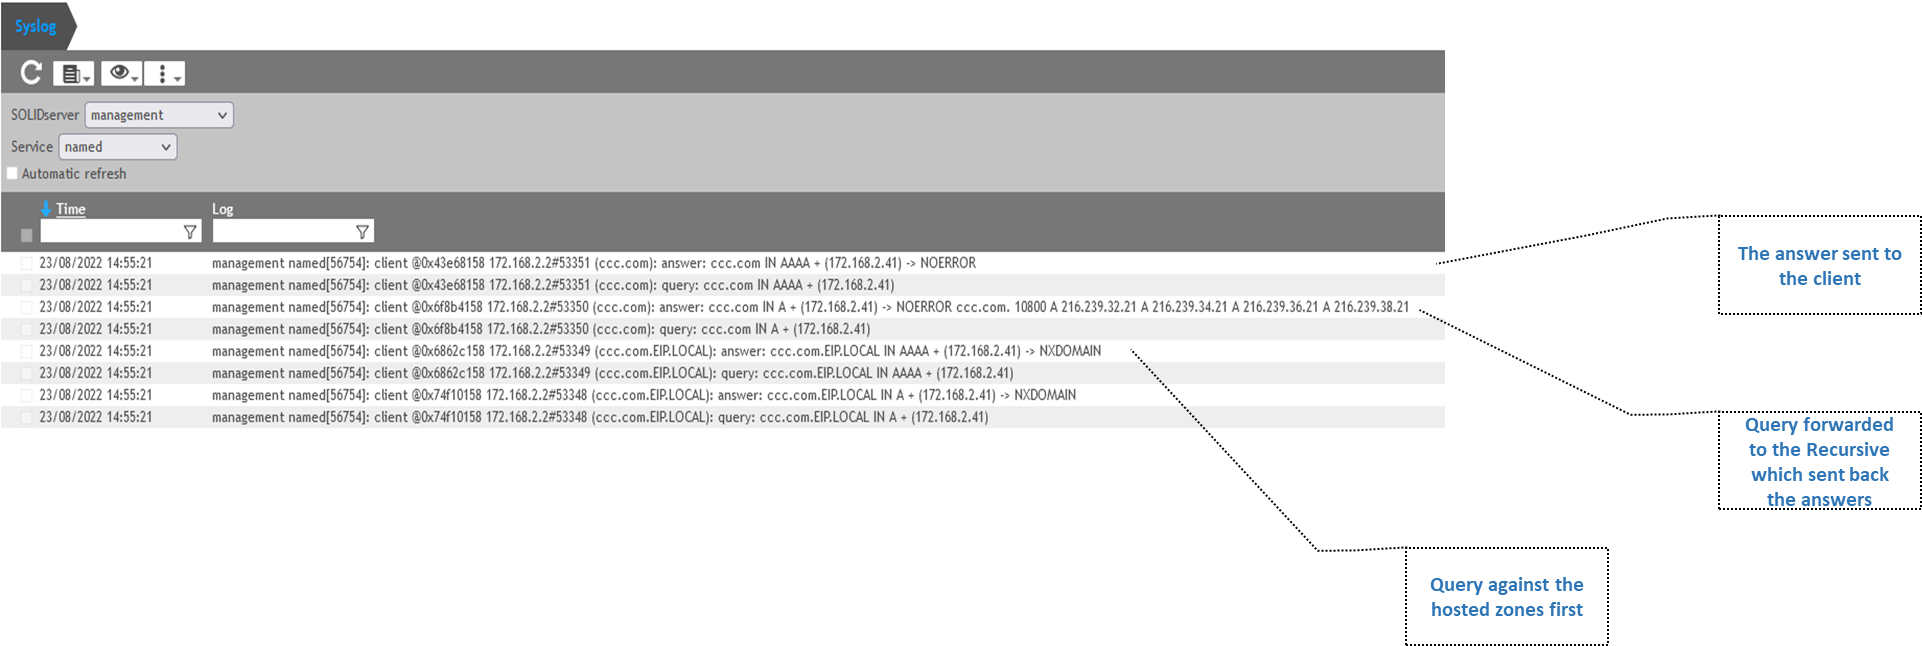
The logs from the authoritative DNS can be seen as following:
Next we will start suspicious behavior from the client by sending NXDOMAINS and check the Guardian logs if the quarantine happened to the client or to the authoritative who forwarded the message:
